
Hello - Tomorrow is a big day for our family - my Niece is getting married, she's the first of my sisters six children to take the plunge and we're all very excited! As usual I've left it to the last minute to make the wedding card (though I did have a clear design idea as I made her invitations so knew I wanted to tie it in with them). I also thought I would have a go at a first tutorial, (just to see if I could )- a very quick and simple technique to make the butterflies I've used on her card (and that appeared on a WOYWW post a couple of weeks ago) ..I'm entering this into the Simon Says Stamp and Show challenge which is 'layers'...so here is the card...(the wedding theme is purple Butterflies!)..
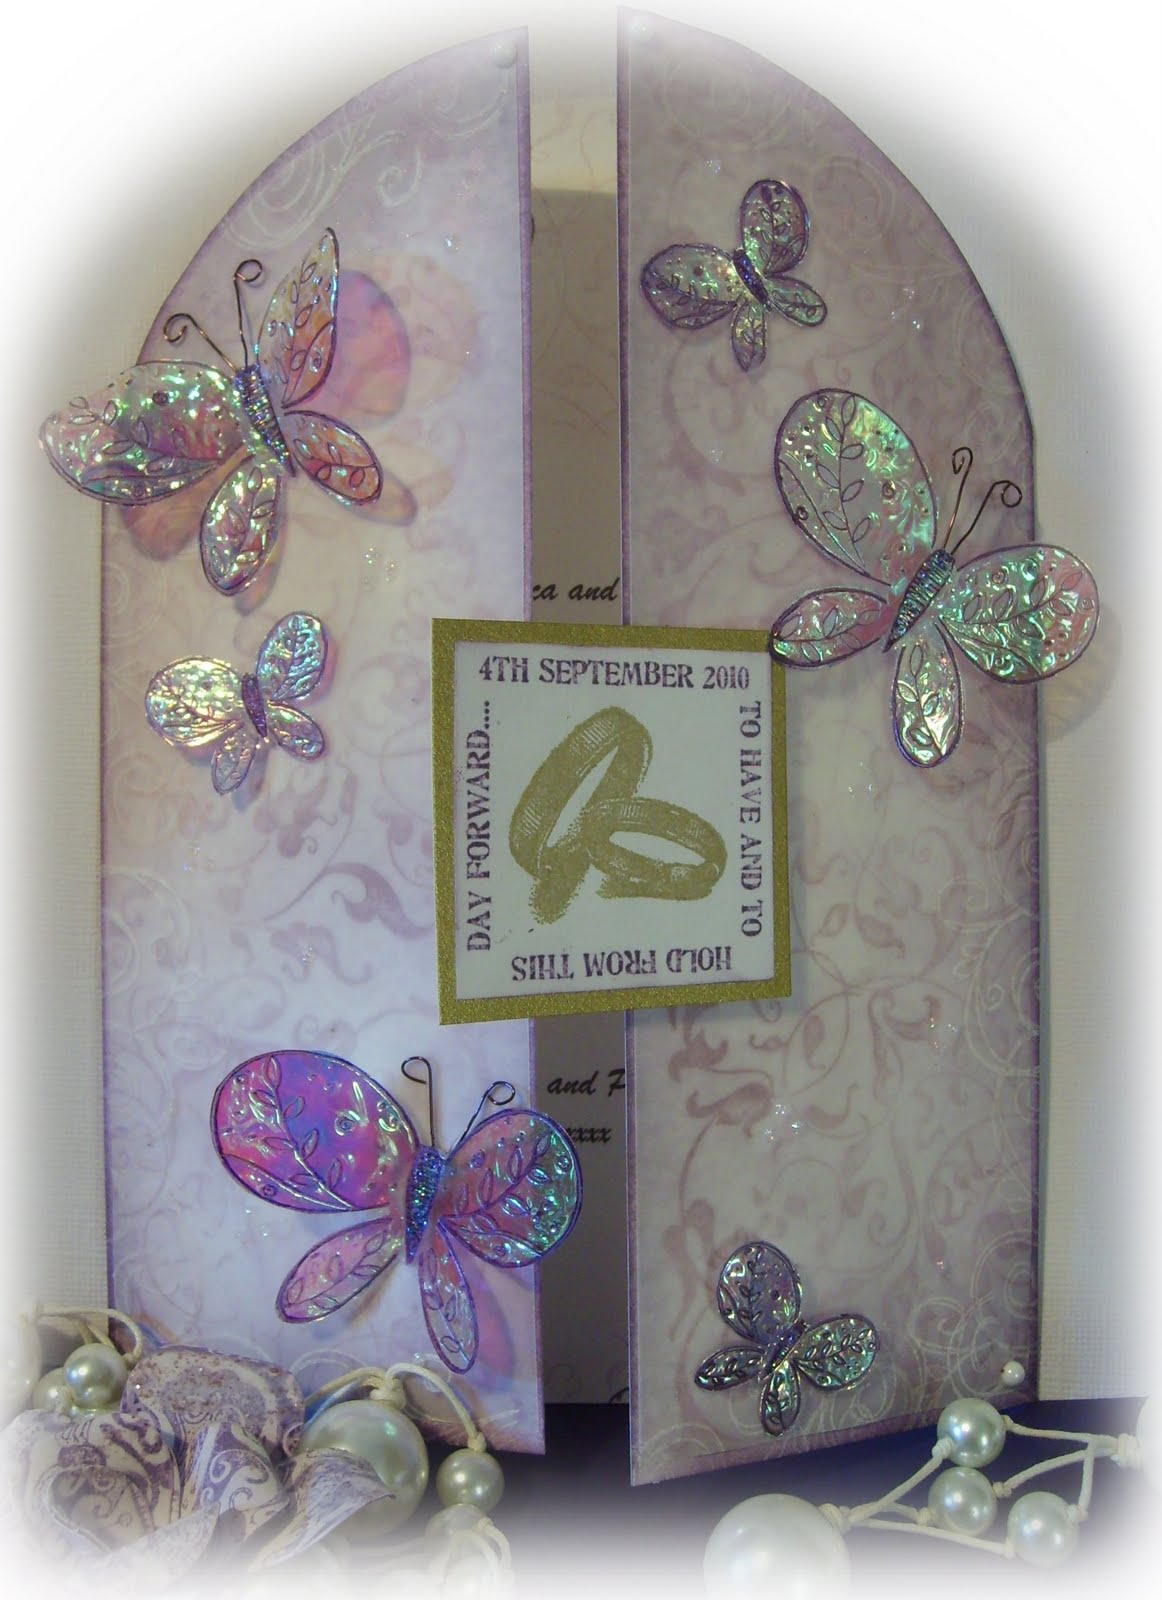
After making the gatefold and cutting the arch shape I inked with Dusty Concorde distress ink. I then inked Judikins Floral Arabesque stamp with Versarmark, stamped onto thin parchment and chalked with pearlescant chalks. I cut two panels from this to fit inside the Arch shape and fixed to front of card, adding a few stamped flourishes in moonlight white ink round the edges (layering the papers gives a more subtle finish than if i'd just distress inked and stamped straight over the top). The date and sentiment are computer generated with the rings stamped in gold inside and layered onto gold card. The Butterflies are made as in the tutorial below. A few spots of crystal stickles add a glittery finishing touch.
..and the inside...

And here's how I made the Butterflies -

Ingredients - Butterfly Rubber Stamp - these are from an Aspects of Design set, Stazon or other permanent Ink pad, iron (non-steam), a piece of parchment or tracing paper, Fantasy film - I've used Aurora, Wire, Stickles - if you like a bit of bling!
Place the stamp face up on your work space and ink with chosen permanent ink - I've used Stazon Royal Purple. (If making more than one piece I ink the stamp between each one.)

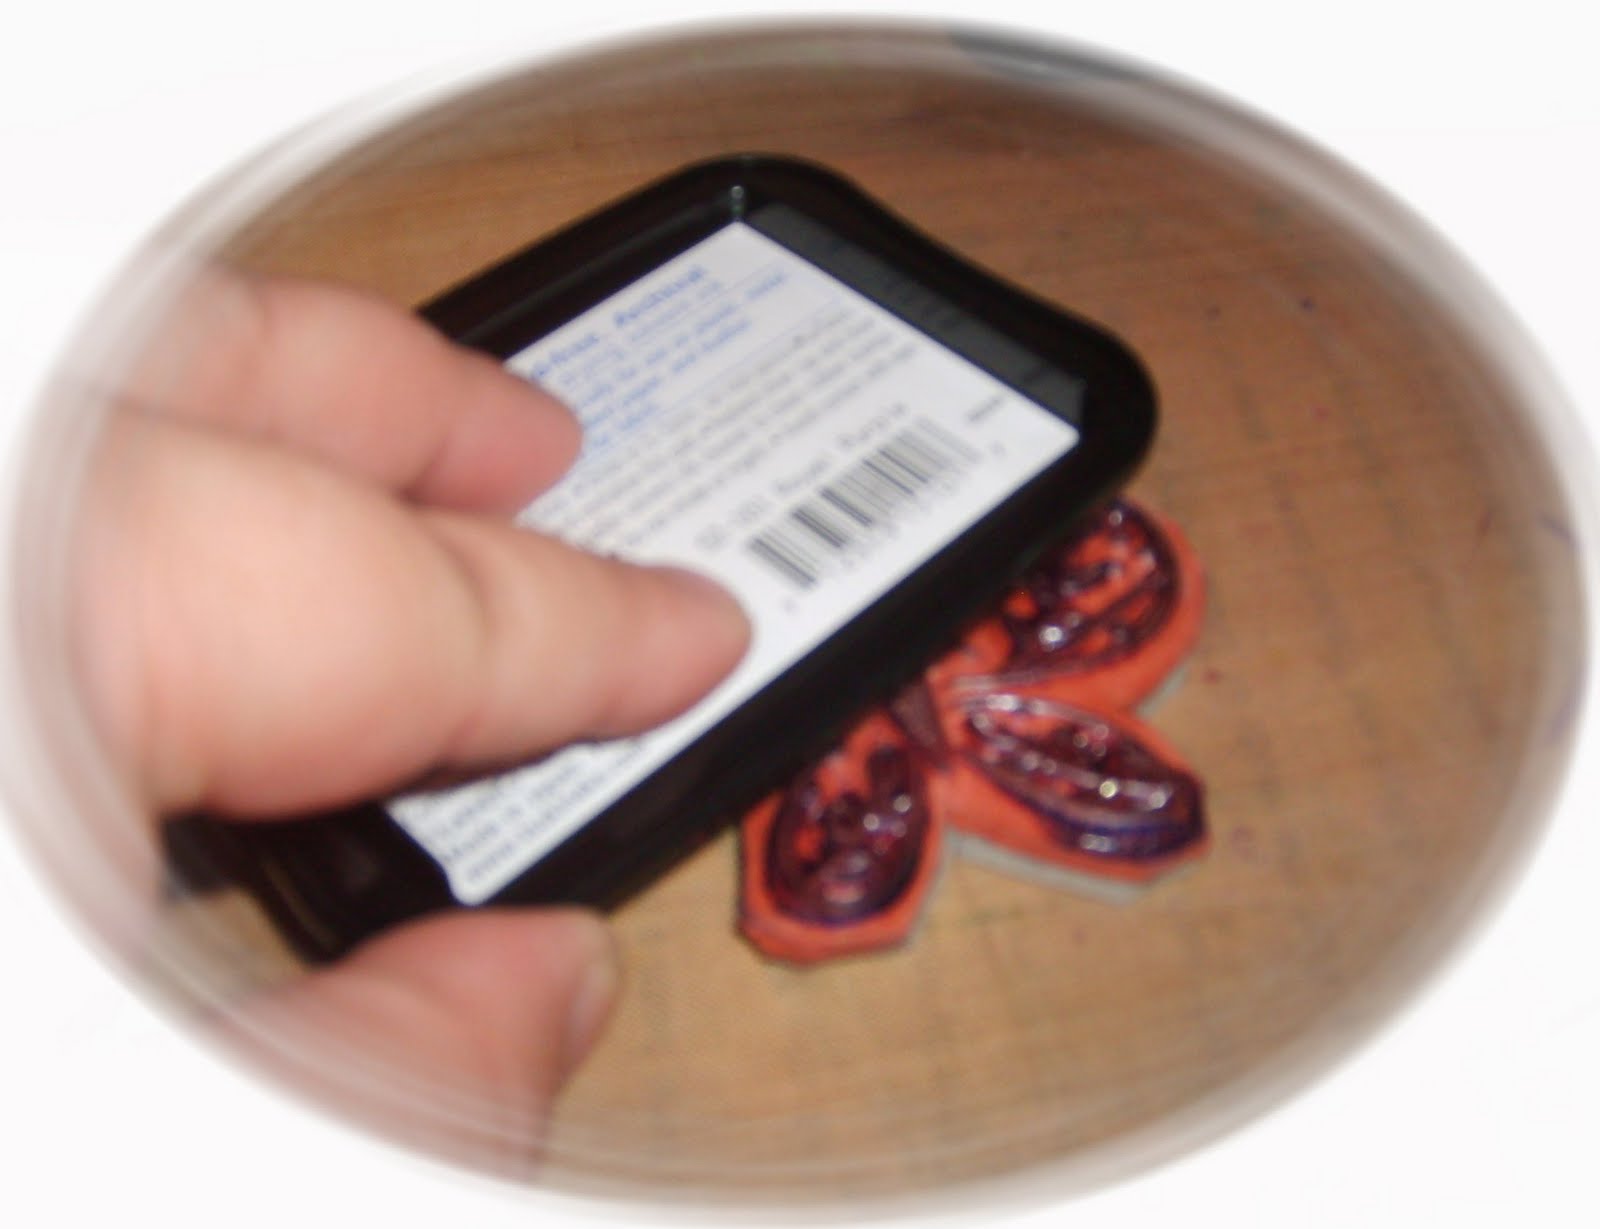
Take layers of fantasy film and lay on top of stamp taking care not to move once placed so as not to smudge ink. I've used three layers of film which I find gives the piece a bit of strength to stay in shape but is still malleable - basically the more layers you have the thicker the finished piece will be (not rocket science!!)

Next lay over a piece of parchment - (or I use cheap tracing paper.) and iron with a craft iron on a high setting or a domestic iron with no steam. You will see the image through the parchment as you heat, the film bonds quickly and the length of time to heat is a bit trial and error as the film changes colour depending on heat applied - just experiment.

Peel away the parchment and film from the stamp - you can re-heat if the film is not bonded all over or you want to experiment with the colour more, just lay flat on a craft sheet (without the stamp), lay the parchment on top as before and iron some more -however this produces a flatter finish as the piece loses the dimension caused from ironing over the stamp.

Once cut out, I added some crystal stickles to the body of the butterfly. I also cut off the antennae and shaped wire to use instead. I folded the film slightly along the length of the butterfly body to add dimension and then attached to my card using a blob of silicon glue in the centre.
Well..if you've got this far, thanks for sticking with it - how did I do ? Esther xx

Wow - beautiful card! I love the butterflies!
ReplyDeleteHelen x
PS - thanks for linking my candy - good luck!
oh wow hun that really is a beautiful card do hope the wedding goes well,and that,butterfly hun its simply stunning,hugs cheryl xxxxx
ReplyDeleteSimply gorgeous, Esther, hope you all have a fantastic day :D xxx
ReplyDeleteYour butterflies are just gorgeous!!! a great accent to your card!!
ReplyDeletethanks bunches for playing along with the Design Teamies and Simon Says Stamp and Show Challenge!!
WOW Esther, those butterflies are stunning and a wonderful tutorial, I love the shimmer too!
ReplyDeleteThe Design Team and I are so pleased that you joined us for the Simon Says Stamp and Show Challenge this week
Thank you
HuGs Kim :)
Great tutorial, wonderful card! Thanks for the mention, you can find a link on our FaceBook Fan Club
ReplyDeleteinfo@artglitter.com
http://www.artglitter.com
http://artglitterblog.blogspot.com
http://www.facebook.com/pages/Art-Glitter/330357605104