Showing posts with label Acetate. Show all posts

Sunday, 19 August 2012

We are Sailing…

I’ve had some inky time to play at my craft desk today and it’s been all about holidays..Pete and I are off to Turkey in September and whenever we go away I always plan to keep a holiday diary, but never actually do it. BUT…this year I’m planning ahead and have made a little book to take in the hope it might encourage me to stick to it. I was inspired by the challenge over at Blockheads Paper Arts which is to make and bind your own mini book.
SD533603
I have used a sheet from an atlas as my front cover, and after painting and stamping, used a double sided sticky sheet  to stick it to a sheet of acetate for added stability and protection. This also gave me another surface to stamp on, creating a collaged layered look.
SD533606 
SD533595I used various papers which I painted with gesso or acrylic paint (or both) and stamped on.

SD533597I made a couple of pages with acetate pockets to tuck tickets/mementos into – I've tucked a scrap of paper in one to try and show it, but it’s tricky to see on the pic.
SD533604I’ve tied the book with seam binding and the finishing touch is a cute little seahorse charm.


I’m sharing this here -
Blockheads Paper Arts – Make a mini book
Anything Goes – Summer Days
Artful Times – Use Acetate
The Artistic Stamper – Holidays

Unruly PaperArts RAQ 1 - Dear Diary

While I still had my holiday/beach themed stamps out I also made a card -
SD533612
I’ve stamped the sailing boat (Rogue Redhead) and antique map (The Stamp Man) on water colour paper, and used Derwent inktense blocks to paint the images. The little crab is from the same Rogue Redhead set.
 I’m sharing this card here -
Less is More – tearing
CAS-ual Fridays – Splish-Splash
Rogue Redhead – Shape Up (use at least 1 circle, 1 square and 1 rectangle).
The Craft Barn – Colour technique
Totally Papercrafts – Inspired by a song (we are Sailing) 
Apologies for the long post, thanks for visiting…Esther xx

Monday, 9 April 2012

MOJO returns !!

Hurrah - I have my crafting mojo back! After a fair few weeks of struggling to have any ideas or motivation, other than my DT piece last weekend I haven't made anything for absolutely ages  - but today I have spent a lovely afternoon at my desk getting inky and messy...and what's more I tried something completely out of my comfort zone and made a male themed tag !
SD533288
Now I have only dipped my toe into the realm of Steampunk once but I was inspired to try this as I recently acquired some new stamps by Andy Skinner and Indigo Blu.
I started with a Tim H tag, and used ‘wrinkle free distress’ technique to add several colours over which I added piece of notebook paper stamped and coloured with aged mahogany DI.   The dashing gentleman is then stamped and embossed over the top.
SD533285
I don’t have lots of shop bought embellishments and trinkets, so used a gear stamp from The Artistic Stamper on acetate and embossed with copper kettle and again in opaque pewter EP. I  left the copper as a larger piece, cutting round the edges and sticking in the corner, then cut some individual gears and added them on top. I had  few bits from an old watch and added these and some eyelets and brads in various metal finishes. A few patches of opaque pewter EP on the tag edges was the finishing touch.
I’m sharing this over at the following challenges -
I’m so pleased to be back in my crafty zone – shame I’ve got it just as I have to go back to work tomorrow !! Thanks for stopping by…Esther xx

Sunday, 11 December 2011

Let it Snow...

.....well no not really - I know it's pretty but i'm in no hurry to have to battle the snow to get to work. But I have enjoyed being a bit creative with a snowy theme today. It's been ages since I've had time to browse through blogland but I did a bit of hopping this morning and found inspiration to try something a bit different. Brenda at Floral fantasies has a tutorial for these ornaments. Brenda uses DP, but I got out my inks and stamps and did what I do best - make an inky mess. I clear embossed Crafty Individuals snowflakes on half the pieces and coloured with Faded Jeans Distress inks. The other pieces I coloured with Tumbled Glass DI and stamped with Faded Jeans.
For the Centre piece I stamped a PSX snowman (The first Christmas stamp I ever bought and I still love it) onto a scalloped circle coloured with DI , added some colour with Promarkers and triple clear embossed over the lot.  On the final layer I sprinkled a little white embossing powder and love how it turned out - I think it looks a bit like floating snow. All I have to do now is decide where to hang it.
I'm sharing this here -


My second make today was a simple card - having to do quick cards now as rapidly running out of time. Inspired by CAS-ual Fridays I made some snowflake masks, sprayed with Perfect pearls mist, then layered a sheet of acetate over the top stamped with white snowflakes , kept in place with brads.  

Hope you've all enjoyed the weekend  - Thanks for stopping by...Esther xx

Sunday, 16 October 2011

.....and back to Christmas

Hello - where has the weekend gone ? I've spent two lovely days in my spare room making Christmas cards and I can't believe it's sunday evening.  So here are a couple of the cards I've made -
This is the first time I've used this cute Lily of the Valley stamp and have coloured it with Pro-markers. I love this stamp but don't often do cute cards because I really struggle with knowing what to do once I've got the coloured image. In the end I've used the leaf detail from the image as inspiration to decorate the rest of the card using a sizzix holly die and a free leaf stamp from Craft Stamper mag. The swirl is a Marianne design die. I'm sharing this card at  -
My second card is quite different - I started by stamping a background of blue snowflakes then stamped white stazon snowflakes on a piece of acetate which I layered over the top.  The sentiment isn't very clear on the pic, it says 'Let it Snow' and is a Penny Black stamp. I've cut it with my nesties and added some lace, ribbon, die cut snowflakes and crystals. I'm sharing this at -
I hope you've all enjoyed the weekend, thanks for stopping by...Esther xx


Tuesday, 17 May 2011

DT call at the Craft Room

'Just three short months ago Julia started the Craft shop she has been dreaming of for quite some time the shop is Craft-Room have you been there yet? The shelves are stocked with lots of goodies and new lines are being introduced all the time.   A few weeks after opening Julia appointed Zoe as Design Team and together they started to dream up a few ideas and plans.    The time has now come to start a new challenge....'

These words drew me in...tempted me and kept nagging away in my head til I finally gave in and decided to go for it!   Julia and Zoe have asked for people to apply for their new Design Team and here I am, trying my luck.  I have chosen three samples of my work, as requested  I hope they show that I have a go at lots of different techniques and styles - the only thing I don't really do is digis...oh and not been very sucessfull with cute Tilda's!

Masking, inking and Stamping on a One Layer Card 

bright, grungy, embossing

alcohol inks, acetate and stamping

.....the bit i'm not so good at is describing why I would be right for the team. I am passionate about crafting - my job is stressful and so creativity is my therapy, taking part in challenges and blogging just gives it added purpose.  I'm commited and passionate and reliable and hope I have a cheery, positive attitude - blimey, haven't said things like that since writing my job application!

Anyway - whether I'm chosen or not I look forward to the start of this new Challenge blog  - right here - and encourage you all to pop over and check it out - (I placed an order with Julia a few days ago and my goodies arrived very speedily!). Esther xx

Sunday, 24 April 2011

April Showers

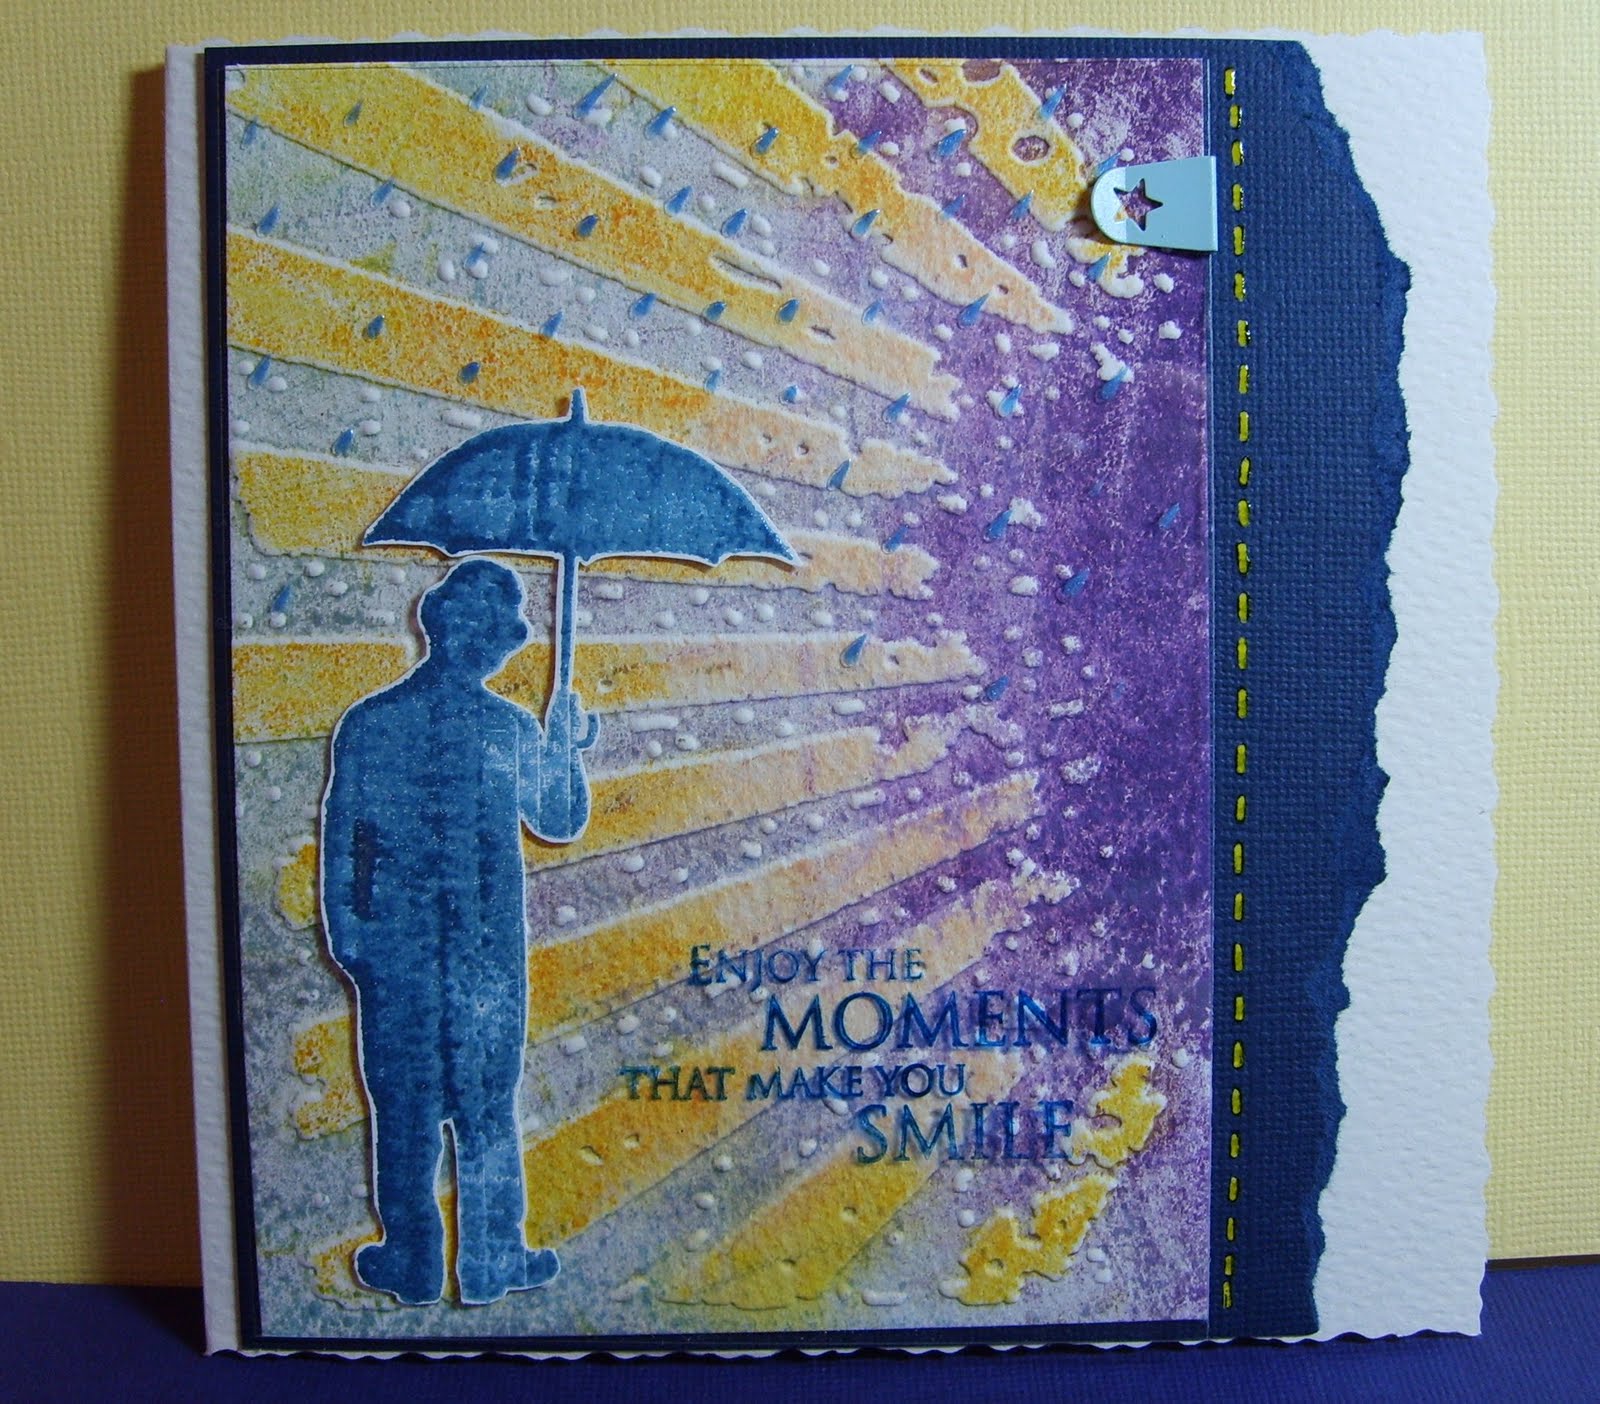
Thankfully we haven't had any rain this weekend, not that it would of mattered because I've been busy writing an assignment that's due next week for the post qualifying social work course I'm doing :-( . Today however I decided to give myself the day off and relax with some crafting, so with the windows open to let the lovely sunshine inspire me I played with my distress inks and texture fades embossing folders a la Sir Tim (blog here).  This is because the lovely Linda at Studio L3 set us the challenge for Grungy Monday to use the technique that Tim demonstrates here with said Distress inks and texture fades. I did take it one step further actually and used ink on both the negative and positive bits of the embossing folder - incredibly fiddly but I'm pleased with the effect! I used water colour paper and gave it a bit of a spritz once I'd embossed.
To put the card together I stamped, embossed and cut out good old Umbrella Man (I love this stamp - am gonna need that Alterations die!) and glued him onto a sheet of acetate onto which I had stamped the sentiment (in Stazon) and blobbed on some 'pearly stuff' (that is what's it's called not just me not remembering!) to create what I hope look like raindrops. I layered onto a piece of blue card and after staring frustrated at it for ages trying to work out what else it needed,  decided on a line of faux stitching down the edge (oh for a real sewing machine!).
 

I'm entering this into the following challenges -
Studio L3 - Grungy Monday
Simon Says Stamp and Show - A Lord of Tim technique
Allsorts - April Showers
Lets ink it up - Show us your stitching
Stamptacular Sunday - pile it on (at least 5 layers - I'm hoping the base card counts as one!)

I hope you've all had a lovely Easter and not too much chocolate! Thanks for stopping by, Esther xx

LinkWithin

Related Posts with Thumbnails